
I turned three ordinary photos into 3D scenes I could rotate around in a web browser app, using a free Apple AI model on my M5 MacBook Air. Setup took about 15 minutes, and the output took even less time. It’s a fun experiment to play with, even though I don’t have a use case for the tech just yet.
SHARP is Apple’s open research model that turns a single photo into a 3D Gaussian splat scene. A splat scene skips the hard edges and polygons of a typical 3D model, building the image instead from millions of tiny, soft, semi-transparent blobs of color that blend into a photorealistic images that you can rotate.
Because the output is metric, with real-world scale, a scene can look life-sized in a headset; people were viewing SHARP scenes on Vision Pro within days of release. You can look around a favorite memory, or export it to view with a shareable web app. Paid alternatives exist, of course; when I tried one, Meshy AI made a usable model but wanted a subscription before I could download it. SHARP is free and runs offline, but it lives on GitHub with fairly obtuse instructions. Here’s how I made it work.
SHARP builds a 3D scene from single photos on your Mac
Here’s what it is, in plain terms
Typical 3D Gaussian splat images build a scene from many photos, stored as millions of soft, colorded 3D blobs that are rendered in real time. SHARP estimates the same sort of output from a single photo.
It’s basically the full-3D cousin of iOS 26’s Spatial Scenes, which separates a photo’s subject from the background so it shifts around as you tilt the phone. Spatial Scenes is an effect you view in Photos and on the Lock Screen; SHARP saves a standard .ply file that works for public splat viewers.
Every scene gets about 1.2 million Gaussians, arranged as two 768×768 layers. My SuperSplat status bar showed exactly 1,179,648 for all three test photos.
SHARP runs on Mac, Windows, and Linux, but Apple only documents Mac and Linux. On an Apple Silicon Mac, the CLI uses Metal (MPS) automatically, so the following steps are Mac-specific. On my M5 MacBook Air, inference took 12, 47, and 58 seconds across three photos, plus about six seconds to load the model. The whole batch finished in roughly two minutes.
Here’s how I set it up on my Mac
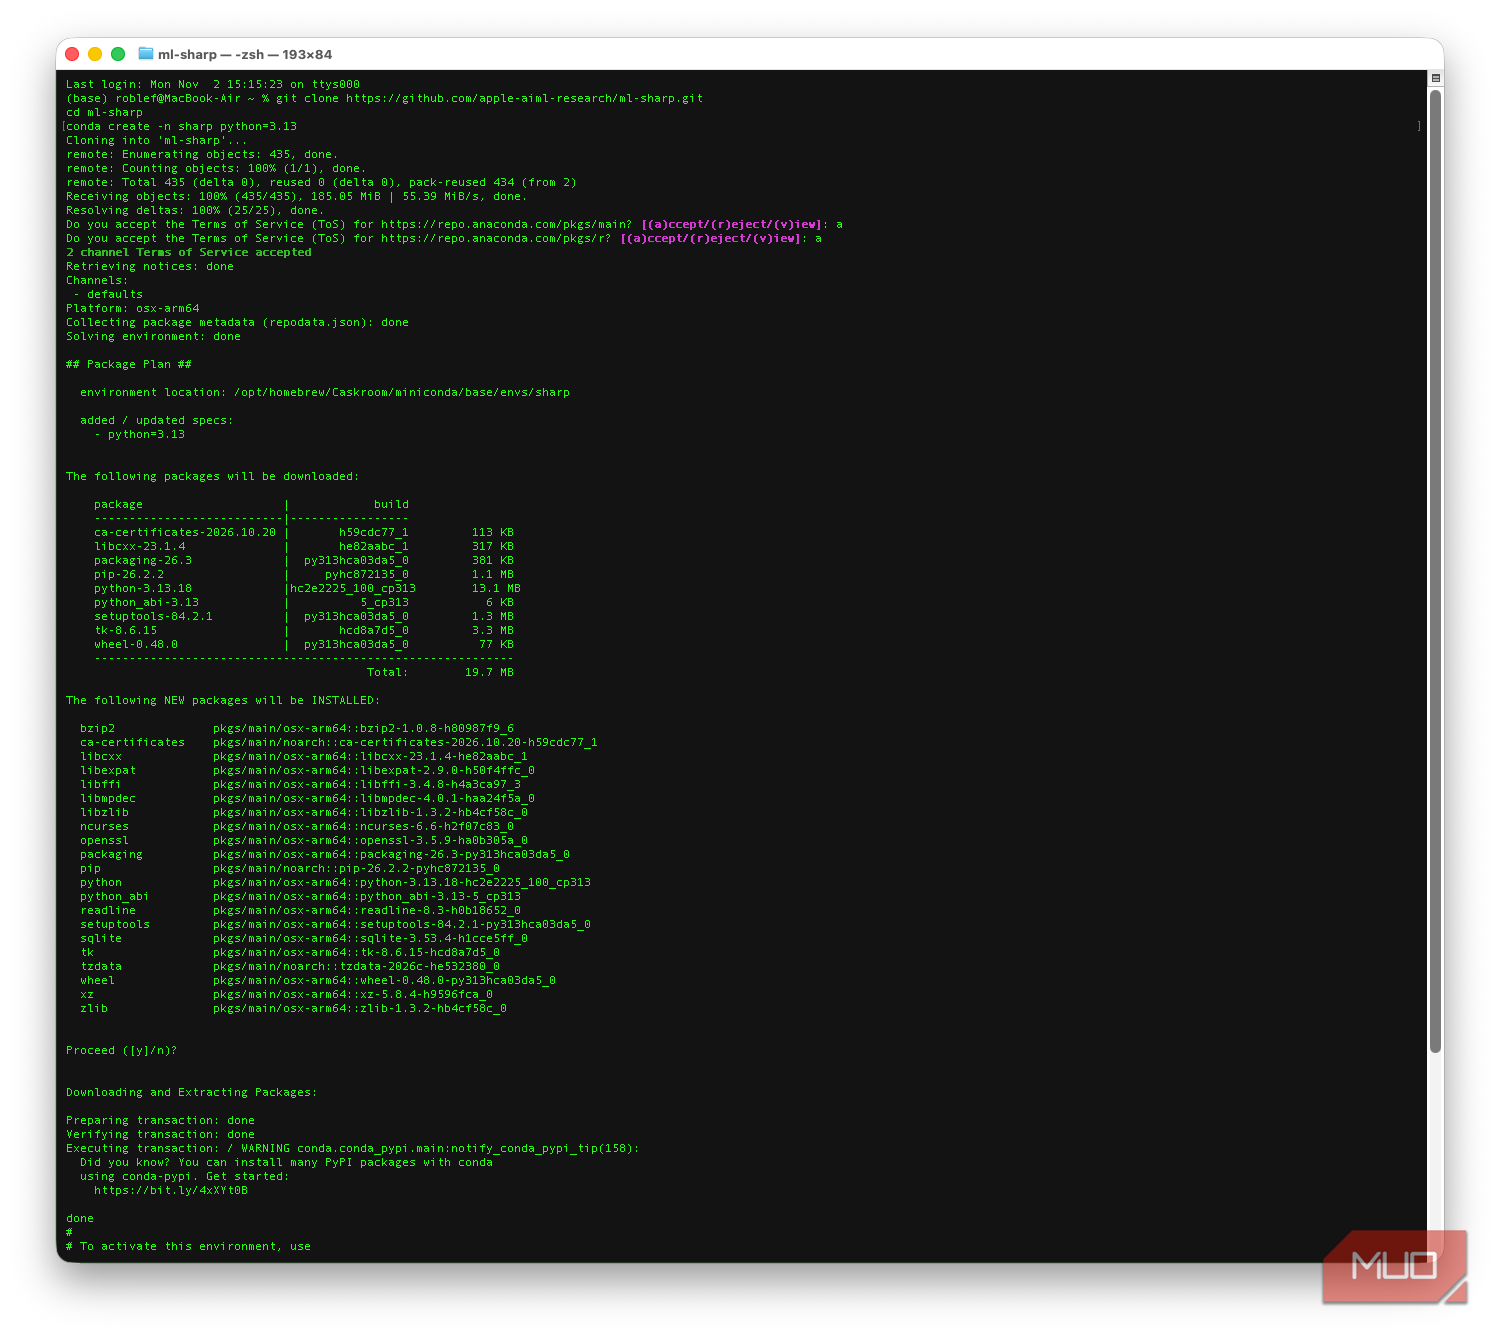 It’s not difficult, but does take some knowledge of Terminal
Step 1: Install Miniconda with Homebrew
Step 2: Download Apple’s code
-
git clone https://github.com/apple-aiml-research/ml-sharp.git, thencd ml-sharp. - Stay in this folder for Step 4.

Step 3: Create a Python 3.13 environment
-
conda create -n sharp python=3.13, thenconda activate sharp. Python 3.13 is what the README specifies, and your prompt should switch from(base)to(sharp). -
If conda stops with a Terms of Service error, run
conda tos acceptand repeat the create command. Anaconda requires TOS acceptance for its default channels. I didn’t hit it, but some setups will.
Step 4: Install SHARP
-
pip install -r requirements.txt, thensharp --help. Seeingpredictandrenderlisted means it worked. -
The folder matters because the requirements file starts with
-e ., which installs thesharpcommand from the current directory. Its Nvidia packages only install on x86 Linux, so Macs skip them. - You’ll see Hugging Face packages scroll by. They’re a dependency for the install, so don’t worry about it.
Step 5: Choose photos with simple subjects
My three tests made the rule obvious. A toy on a desk held up best, a portrait looked convincing with smears where my head hid the wall, and a cluttered shot of my chihuahua on a couch fell apart into floating layers. The paper flags macro shots, starry skies, and water reflections as depth-estimate failures.
Use originals when you can. SHARP reads focal length from EXIF data and assumes 30mm when it’s missing. My selfie, a 720×1280 copy with no lens data, triggered that warning and still looked good, but originals are better.
iPhone HEIC files work as-is, thanks to built-in pillow-heif support.
Once you’ve made your choices, put them all in one folder: mkdir ~/sharp-in.

Step 6: Run one command
sharp predict -i ~/sharp-in -o ~/sharp-outIn the output, look for Using device mps, which confirms the Mac’s GPU is doing the work. The first run downloads the model to ~/.cache/torch/hub/checkpoints/. Mine was 2.62GB and took 40 seconds on a fast connection; later runs skipped it.
Batch everything at once, since the CLI loads the model once and loops through the folder. Each photo becomes a roughly 66MB .ply file.
Step 7: Open the result in SuperSplat
- SuperSplat is a free, browser-based splat editor from PlayCanvas. Go to superspl.at/editor to use it.
- Drag a .ply into the window, or use File > Import. Drag to orbit; scroll to zoom.
- SHARP uses a y-down coordinate system that other viewers may show upside down. SuperSplat v3.7.0 applied a 180-degree Z rotation automatically in my test, so the scenes loaded upright. In another viewer, you might have to set that rotation yourself.
- If you want to share, export a standalone HTML viewer or a compressed PLY, which is far smaller than the 66MB original.
-
Nvidia owners on Linux can add
--renderfor an automatic camera-flythrough video, though the README says that option requires CUDA.
A free way to step into your photos
If you’re looking for a 3D printable model, a paid mesh tool like Meshy is still your best bet. SHARP is more for scenes to look at, not models to print.
Still, a life-size view of an old photo in a VR headset or an interactive 3D image you can send as a single HTML file might have its uses. That it’s coming from a free tool running entirely on your own laptop makes it even more interesting. Give it a try and see how it works for you.