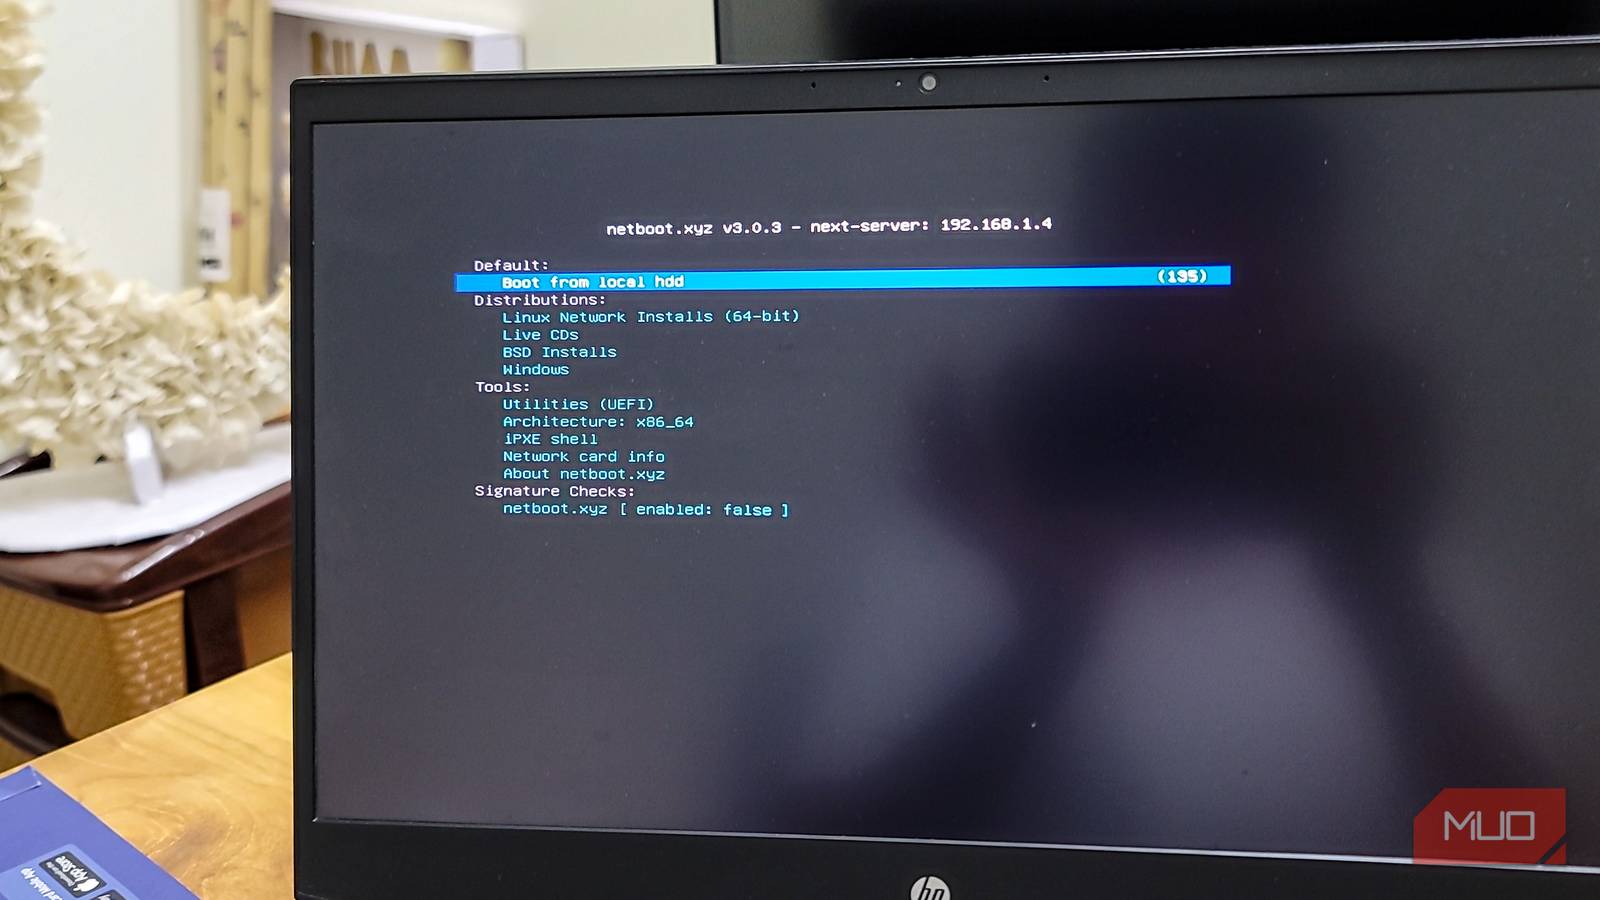
If you are like me and install and reset operating systems often, you likely have a bootable USB flash drive with all your distros handy. But what if you could test and install Linux distros over the network and never have to carry a USB flash drive? Netboot.xyz lets you boot a computer over the network using PXE/iPXE instead of a USB drive, and I wish I’d found it sooner.
What’s netboot.xyz?
An open-source network boot service that replaces your USB drive
Netboot.xyz is an open-source network boot service that lets you boot a computer over the network to install or run any supported operating system. Instead of always carrying a rescue or recovery USB, you can set up netboot.xyz on a server and then access it from any PC on your local network to test all the Linux distros you want.
By default, it serves a boot menu with live CDs and installers for distributions including Debian, Elementary OS, Arch, Zorin, and utilities like CloneZilla, SystemRescue, and Ultimate Boot CD. Pick an entry from the menu, and the computer pulls the necessary files over the network and boots straight from them. There is also a web interface on port 3000 that lets you manage boot menus and pull files from local storage on your server for faster access.
Setting up netboot.xyz
A Docker container and three folders is all you need
First, you need a computer with Docker installed. Any Linux machine or even an old laptop will work, as long as it stays on and connected to your network. Once Docker is ready, create a directory to store your netboot.xyz files:
mkdir netboot_xyz
cd netboot_xyz
mkdir assets config
Next, create a docker-compose.yml file inside that folder and add the following configuration from LinuxServer.io:
services:
  netbootxyz:
    image: lscr.io/linuxserver/netbootxyz:latest
    container_name: netbootxyz
    environment:
      - PUID=1000
      - PGID=1000
      - TZ=Etc/UTC
    volumes:
      - ./config:/config
      - ./assets:/assets
    ports:
      - 3000:3000
      - 69:69/udp
      - 8080:80
    restart: unless-stopped
Run docker compose up -d to start the container. Port 69 handles TFTP (the protocol that serves boot files), port 3000 gives you the web UI, and port 8080 serves local assets over HTTP.
Open PowerShell as administrator, and run the following commands to allow the ports through Windows Firewall:
New-NetFirewallRule -DisplayName "netbootxyz TFTP" -Direction Inbound -Protocol UDP -LocalPort 69 -Action Allow
New-NetFirewallRule -DisplayName "netbootxyz Web" -Direction Inbound -Protocol TCP -LocalPort 3000,8080 -Action Allow
The web UI
Open a browser and go to http://your-server-ip:3000. The web interface lets you customize the boot menu, download additional boot assets, and manage your local mirror. If you want faster boots, you can download distro files to the assets folder so they load from your server instead of pulling from the internet every time.
Configure DHCP for network boot
Tell your router where the boot server is
For PXE boot to work, you need to configure your router’s DHCP server to tell client machines where the TFTP server is and which file to request. The two key settings are the Next Server field (the IP address of the machine running netboot.xyz) and the Boot File Name (set to netboot.xyz.kpxe for legacy BIOS or netboot.xyz.efi for UEFI).
The catch is that most consumer routers don’t let you change DHCP boot options. If your router supports it (OPNsense and pfSense do), set it up under the DHCP server settings. If it doesn’t, you can run a DHCP proxy using dnsmasq (Linux) or Tiny PXE Server (Windows) alongside your existing router. A proxy DHCP server doesn’t replace your router’s DHCP. It runs alongside it and only responds to PXE boot requests, leaving regular DHCP alone.
You can add a dnsmasq container to your existing Docker setup or run it separately. The key configuration lines tell dnsmasq to match PXE boot requests and point them to the correct boot file on your netboot.xyz server. If you already run Docker containers for other self-hosted services, adding a dnsmasq container alongside netboot.xyz is a quick addition. Tiny PXE Server is a native installer and binds directly to your real network adapter.
Boot from netboot.xyz
Network boot any machine on your LAN
With the server running and DHCP configured, boot any wired computer on your network and enter the boot menu (usually by pressing F12, F11, or Del during startup). Select the PXE or Network Boot option, and the machine will pull the boot file from your netboot.xyz server.
You will see the netboot.xyz menu appear, listing all available distros and utilities. Pick the one you want, and the installer or live environment loads directly over the network.
Do note that PXE boot only works over a wired Ethernet connection. Wi-Fi doesn’t support PXE, so the client machine needs to be plugged into your network. You also need to disable Secure Boot in your BIOS settings, since netboot.xyz’s iPXE binaries are not signed by Microsoft.
The boot speed depends on your network. On a gigabit LAN, it’s comparable to booting from a USB 2.0 drive. It won’t match a fast USB 3.0 stick, but for testing distros and running recovery tools, the convenience of not needing physical media makes up for it.
Windows has a better alternative
iVentoy makes network booting Windows painless

While it’s technically possible to boot Windows from netboot.xyz, it’s complicated. You need to set up a WinPE environment, extract and host the Windows install files separately, and configure SMB shares for the installer to access the setup files. It works, but it’s a lot of moving parts for something that should be simple.
As an alternative, I recommend using iVentoy. It’s a network boot tool built by the same developer behind Ventoy, the popular multi-boot USB tool. iVentoy acts as a PXE server that can boot ISO files directly over the network. Drop your Windows ISOs, Linux ISOs, or WinPE images into the iso folder, start the server, and PXE boot any machine on your network. It handles both BIOS and UEFI clients, and the setup takes minutes rather than hours.
The big advantage over netboot.xyz for Windows is that iVentoy boots ISO files natively, so you don’t need to extract anything or set up separate file shares. For Linux, netboot.xyz is still my first choice because of its extensive boot menu and live CD support, but for Windows deployments, iVentoy is the easier path.
Network booting is simpler than it looks
At first glance, the entire process of booting over a network looks unnecessarily complicated, especially when compared to carrying a USB flash drive. You need Docker, configure DHCP, TFTP servers, and boot file names. But once you get through the initial setup, it runs itself. The Docker container starts on boot, the DHCP settings don’t change, and every machine on your network gains access to a library of operating systems and recovery tools.
It’s not perfect. Netboot.xyz can’t always run the latest editions of a distro the day they launch. You have to wait until they become available on netboot.xyz’s servers, or build your own menu configuration if you need bleeding-edge releases. And the wired-only limitation means laptops without an Ethernet port need a USB-to-Ethernet adapter, which feels ironic when the whole point is eliminating USB drives.
But at the end of the day, it saves me from the hassle of carrying every OS and recovery tool I want to run on a USB flash drive.