I’ve never been a fan of third-party cleanup apps, mainly because your PC usually doesn’t need one. Several that I’ve tried require clicking past some upsell prompt after a scan before they display anything.
The tools you need are already built into Windows, and with a handful of PowerShell commands, you can reclaim space, fix stubborn glitches, and keep your drive tuned in minutes. No need for downloads, and no services running permanently in the background. These are my go-to commands.
Remove-Item -WhatIf
See exactly what a Temp cleanup would delete first

Storage Sense is the built-in cleanup tool on Windows, but by default it’s off. Even when it’s on, it only kicks in once the drive runs low on space. Until then, you may have a pile of leftovers from installers and apps sitting in your Temp folder.
I clear them from PowerShell, but before actually removing anything, I preview what PowerShell will remove with this command:
Get-ChildItem "$env:TEMP" -File -Force | Where-Object { $_.LastWriteTime -lt (Get-Date).AddDays(-7) } | Remove-Item -WhatIfThe command above will target the files within the Temp folder that have remained unchanged for the last seven days. It leaves anything that’s newer, ensuring it doesn’t touch files that open apps are still using.
I include the -WhatIf flag so that PowerShell shows what it would delete (a simulation) without actually deleting anything. This preview is important because files I delete this way skip the Recycle Bin. To actually delete these items, I use the same command just without the -WhatIf flag.
This works better for me than a cleaner app because it allows me to set the rules. Apps may decide what counts as junk, but this command makes me look first.
I can tweak it for other outcomes. For instance, I swap Remove-Item -WhatIf for Measure-Object -Property Length -Sum if I want to know how much space is at stake.
Deleting with this command handles only files in the Temp folder’s root and doesn’t remove subfolders or recurse because it uses -File (and no -Recurse).
Don’t run this against Documents or Downloads—you may delete needed files.
DISM cleanup
Skip the 30-day wait on Windows’ own cleanup
By default, Windows keeps the older versions of updated components as a fallback if you need to roll back an update. This is the equivalent of holding on to all of your old phone boxes after a move. There is a scheduled task that clears them out after at least 30 days. But you can skip that wait with DISM.
I start with a look, running the command below as an administrator:
DISM /Online /Cleanup-Image /AnalyzeComponentStoreIt shows me the real size of the component store, which lives in the WinSxS folder. This is important because File Explorer typically shows a bigger size than the real one. The command also tells you if a cleanup is recommended, and if it is, I run the next command:
DISM /Online /Cleanup-Image /StartComponentCleanupWhen a cleanup isn’t recommended, I close the window. Going ahead with the cleanup will only free up a little space and may limit rollback options when needed. It’s useful to have a command that can tell you to do nothing.
I’ve seen third-party tools that promise to shrink this folder, but you don’t need them. Using DISM is Microsoft’s own documented option. Third‑party tools that modify Windows system folders can be riskier than DISM. Avoid deleting anything from WinSxS manually.
I’ve seen people recommend using a /ResetBase switch. Something like: DISM /Online /Cleanup-Image /StartComponentCleanup /ResetBase. I’d advise against it for most people because it removes every superseded version, making it impossible to uninstall updates you’ve already installed.
Optimize-Volume
A tune-up that knows HDD from SSD
You have to defragment your hard drives, but SSDs don’t require defragmentation; they use the TRIM command, which tells the drive which blocks are safe to clear. Using Optimize-Volume will pick the right job depending on the drive you point it at.
|
Drive |
What Windows does |
Payoff |
|---|---|---|
|
Hard drive (HDD) |
Defragments |
Noticeable if it’s been neglected |
|
Solid-state drive (SSD) |
Trims |
Modest housekeeping |
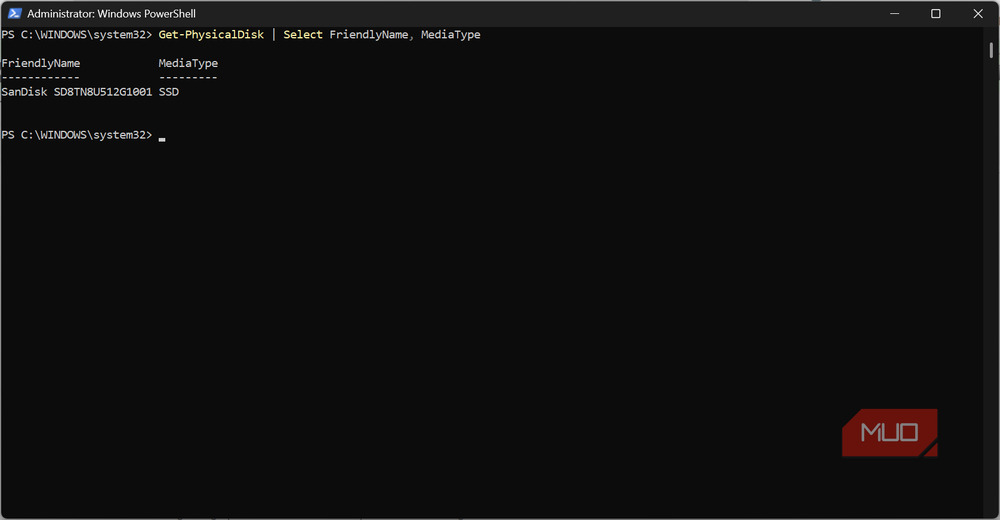
Defragmenting an SSD is outdated advice, but I still see it on some forums. If you’re not sure of what you have, run the command below:
Get-PhysicalDisk | Select FriendlyName, MediaTypeFor the next two commands, open PowerShell as an administrator. First, get a preview of what Windows thinks of the drive. The -Analyze switch will give you this report without changing anything:
Optimize-Volume -DriveLetter C -Analyze -VerboseNext, run the real thing:
Optimize-Volume -DriveLetter C -VerboseBy default, Windows is set to optimize drives once a week, so I reserve this command for the odd occasion. For instance, I use it after moving a huge pile of files or when I suspect the schedule got switched off.
There’s a built-in Defragment and Optimize Drives app, but I use this command because -Verbose shows me what’s happening instead of a progress bar that tells me nothing.
DISM repair and SFC
Fix the glitches a restart never touches
Corrupted system files may cause Windows Update to fail. In such cases, even the Settings app may crash when you open it, and other apps may die for no clear reason. Restarting the computer will only clear memory and not the damaged files. The DISM and SFC commands can fix damaged files.
Before you use these commands, remember they repair the PC. They don’t give speed boosts. However, if the device is stuck in a repeated failure, it can feel smoother afterward.
Run these commands in order from an administrator window:
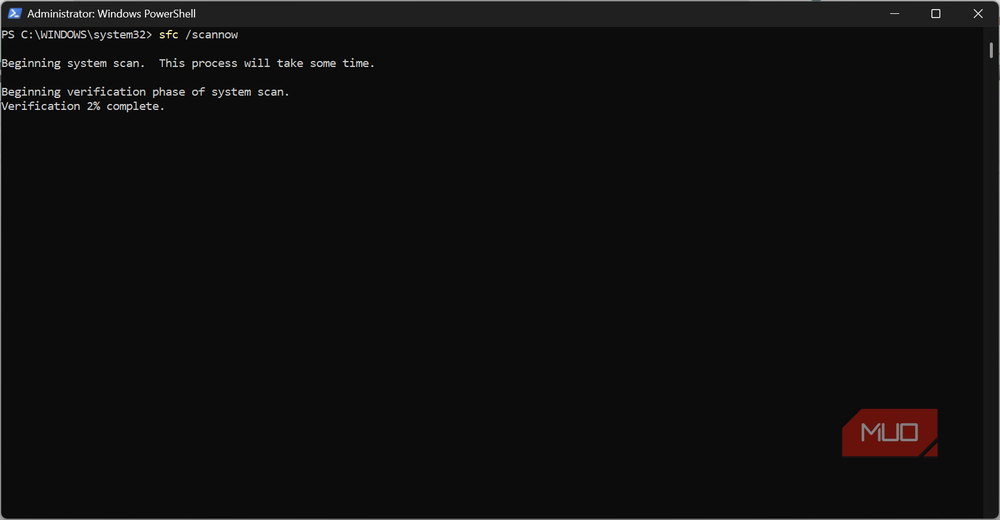
DISM /Online /Cleanup-Image /RestoreHealthDISM will first repair the component store, after which SFC checks your protected system files against it, ensuring there are healthy copies it can work with. By default, RestoreHealth will pull replacement files from Windows Update, so stay online while the command runs.
When SFC completes, you get one of these three messages: no problems found, problems found and repaired, or problems found that it couldn’t fix. If you get the last one, rerun DISM, then SFC.
Your PC can skip the cleanup app
I use these commands only when I have a need to. This means that I could go weeks without them, and I usually find out when there is a need for the Temp folder preview and the DISM analysis.
None of these needs a separate installation, so you already know what commands should take the place of the cleanup apps you have been using.